What is a reverse proxy?
A reverse proxy is like a smart receptionist sitting in front of your internal servers and services.
Instead of letting visitors (like your web browser) talk directly to each application running in your home lab, everyone talks to the receptionist first.
What it does
- Single Entry Point
Instead of remembering complex IP addresses and port numbers (like 192.168.1.148:7575 for Homarr or 192.168.21.123:8006 for Proxmox), you send all requests to one place on standard ports (80 or 443). - Name-Based routing
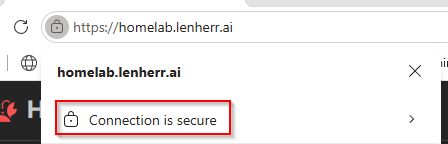
When you type homelab.lenherr.ai, the reverse proxy looks at the domain name in your request, checks its rulebook, and forwards the connection to the correct internal server and port behind the scenes. - Centralized SSL/TLS Encryption
Instead of installing SSL certificates on every single application or container, the reverse proxy handles encryption for everything. It shows visitors a valid SSL certificate (like our GoDaddy Wildcard cert) and handles the secure connection at the front door. - Privacy and Security
The outside world only ever sees the reverse proxy’s IP address (192.168.0.11). Your actual applications and internal server IPs stay hidden safely behind it.
Container deployment
To deploy a container in proxmox is very easy. You can just go to https://community-scripts.org/ and search for your service or app.
Then we go to ge Proxmox Shell copy the link in and the script does the rest.

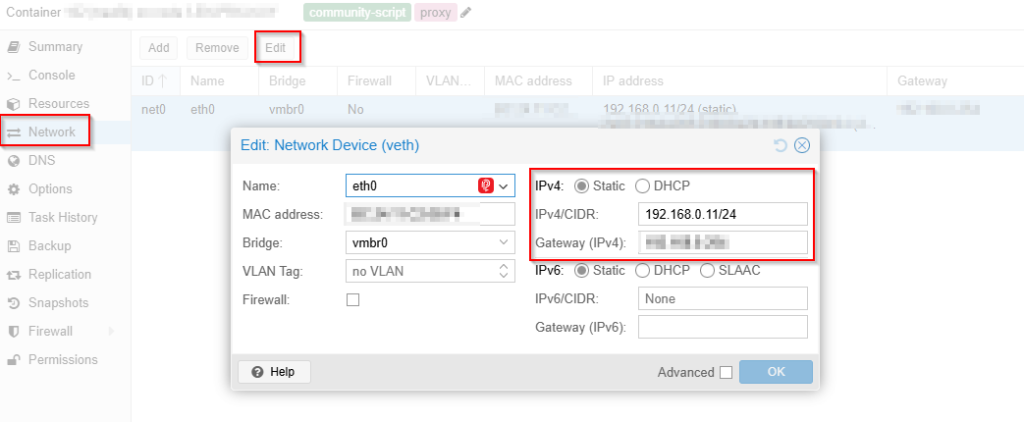
We set a static IP for our traefik container in the Proxmox GUI:
Certificate upload
Now we upload our SSL certificate (here called fullchain.pem) and our private key (privkey.key) to the traefik container.
We create the destination directory inside the Traefik LXC:
mkdir -p /etc/traefik/certsCode language: Bash (bash)Copy our certificates to the Proxmox VE (via PowerShell)
scp C:\Pfade\zu\deinen\certs\fullchain.pem root@192.168.0.20:/root/fullchain.pem
scp C:\Pfade\zu\deinen\certs\privkey.pem root@192.168.0.20:/root/privkey.pemCode language: PowerShell (powershell)
Copy our fullchain.pem and privkey.pem into /etc/traefik/certs/.
ct push <CTID> /root/fullchain.pem /etc/traefik/certs/fullchain.pem
pct push <CTID> /root/privkey.pem /etc/traefik/certs/privkey.pemCode language: Bash (bash)
and set the permissions:
chmod 600 /etc/traefik/certs/privkey.pem
chmod 644 /etc/traefik/certs/fullchain.pemCode language: Bash (bash)
Active Directory DNS configuration
To route all incoming subdomain requests directly to Traefik, we update our DNS entries in the Windows Active Directory DNS Manager.
We create an A-Record for the traefik-server:
- Name: Servername
- IP address: the static assigned IP from before
The we create CNAME records and point them to our traefik-server-dns-object.
- one for our homelab
- one for our adguard
- one for our proxmox-cluster
- one for traefik itself
Main configuration (/etc/traefik/traefik.yml)
Replace the current /etc/traefik/traefik.yml with the clean configuration below. This defines entry points, enables the dashboard, and sets the file provider path while disabling default ACME/Let’s Encrypt behavior.
global:
  checkNewVersion: false
  sendAnonymousUsage: false

log:
  level: INFO

entryPoints:
  web:
    address: ":80"
    http:
      redirections:
        entryPoint:
          to: websecure
          scheme: https

  websecure:
    address: ":443"

providers:
  file:
    directory: "/etc/traefik/config"
    watch: true

api:
  dashboard: true
insecure: trueCode language: YAML (yaml)Note: Ensure no duplicate or legacy configuration files (such as traefik.yaml) exist in /etc/traefik/ to prevent conflicting settings.
Dynamic configuration (/etc/traefik/config/dynamic.yml)
Create the directory and dynamic configuration file:
mkdir -p /etc/traefik/config
nano /etc/traefik/config/dynamic.ymlCode language: Bash (bash)
Paste the following valid Traefik v3 configuration (depends on your configuration you want to set up):
tls:
  certificates:
    - certFile: /etc/traefik/certs/fullchain.pem
      keyFile: /etc/traefik/certs/privkey.pem
      stores:
        - default

http:
  routers:
    traefik-dashboard:
      rule: "Host(`traefik.lenherr.ai`)"
      entryPoints:
        - websecure
      service: api@internal
      tls: {}

    homarr-router:
      rule: "Host(`homelab.lenherr.ai`)"
      entryPoints:
        - websecure
      service: homarr-service
      tls: {}

    adguard-router:
      rule: "Host(`adguard.lenherr.ai`)"
      entryPoints:
        - websecure
      service: adguard-service
      tls: {}

    proxmox-router:
      rule: "Host(`proxmox.lenherr.ai`)"
      entryPoints:
        - websecure
      service: proxmox-service
      tls: {}

  services:
    homarr-service:
      loadBalancer:
        servers:
          - url: "http://192.168.0.12:7575"

    adguard-service:
      loadBalancer:
        servers:
          - url: "http://192.168.0.10:80"

    proxmox-service:
      loadBalancer:
        serversTransport: pveTransport
        servers:
          - url: "https://192.168.0.20:8006"

  serversTransports:
    pveTransport:
      insecureSkipVerify: trueCode language: YAML (yaml)
Restart & verification
Restart Traefik Service:
systemctl restart traefikCode language: Bash (bash)Verify Logs for Errors:
journalctl -u traefik -n 25 --no-pagerCode language: Bash (bash)Clear Local DNS Cache (Windows Client):
ipconfig /flushdnsCode language: Bash (bash)Now your internal services should be reachable and configured with the correct SSL-certificate like here: