Download & install the plugin “Solid Security”
In your WordPress admin portal go to “Plugins” and download and install the Solid Security plugin.
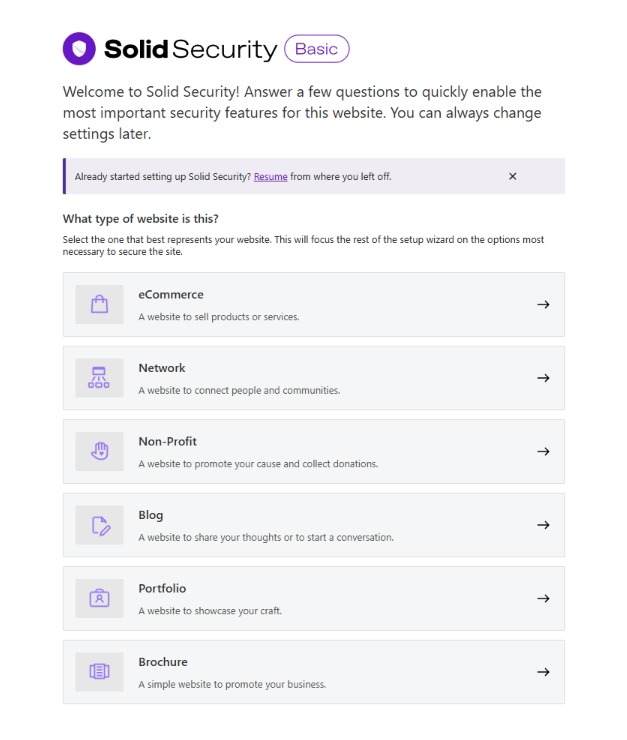
After the plugin is installed, it will ask you automatically some questions about your website. Like what is the intended use and is it your website. In my case I choose blog and continue.
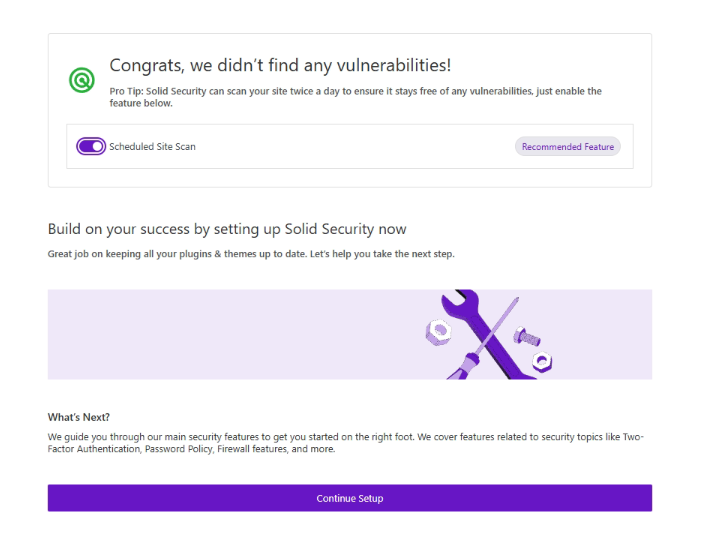
The plugin first asks you to scan your website. In my case I chose to ran a scan and it didn’t find any vulnerabilities. Let’s continue with the setup.
Configure the plugin
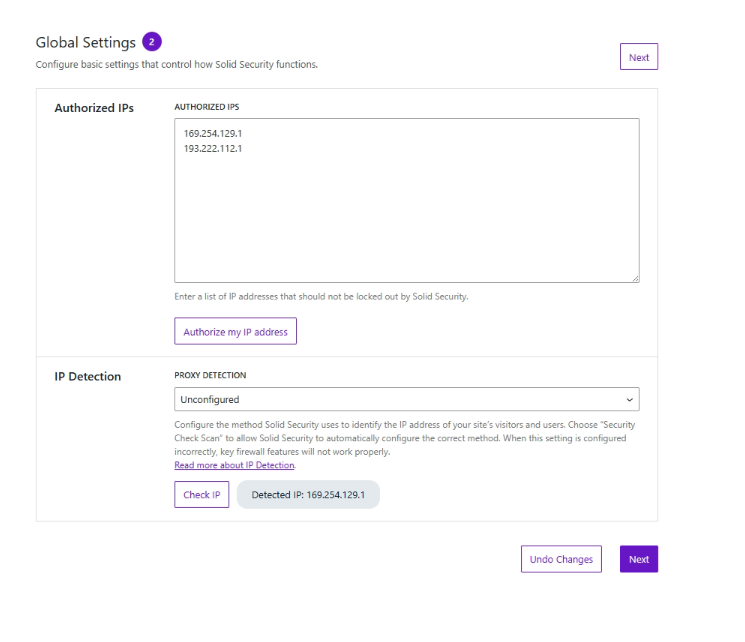
Global Settings
We skip a few steps and continue after the initial setup. Lets click on “Security” -> “Settings” and edit / tweak some settings. In the global settings you can configure your whitelisted IP’s. These IP addresses which can not be locked out by SolidSecurity.
In the section “IP Detection” we choose the option “Security Check Scan” to identify the IP addresses of our visitors to make sure all the firewall settings are working correctly as well.
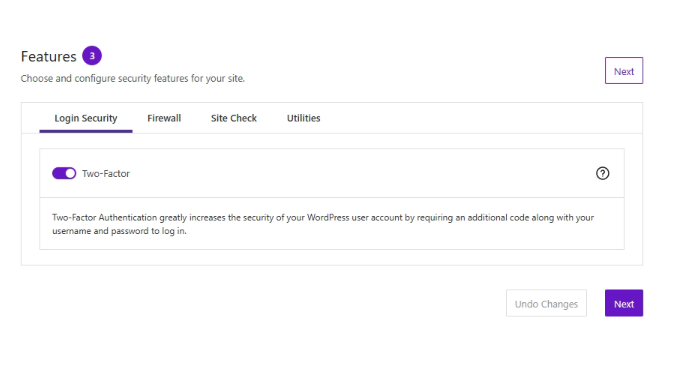
In the “Features” section we first configure the Two-Factor authentication for our admins and users. The only thing we do here, is to make sure that we enable the Two-Factor authentication.
Features
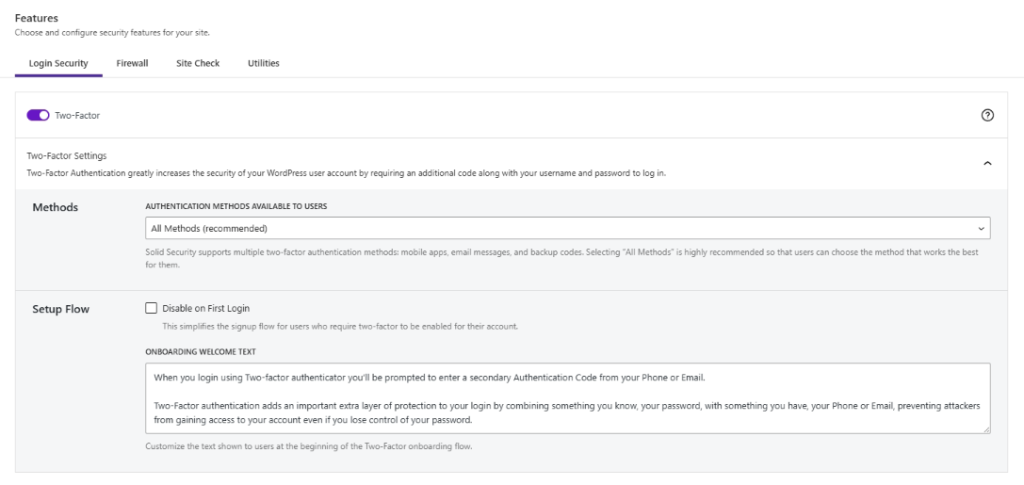
We choose to allow all methods for Two-Factor authentication and we don’t toggle the checkbox in the section “Setup Flow” If we check this box the Two-Factor authentication will be disabled for the first login of these users. But we want the 2FA to be active right away.
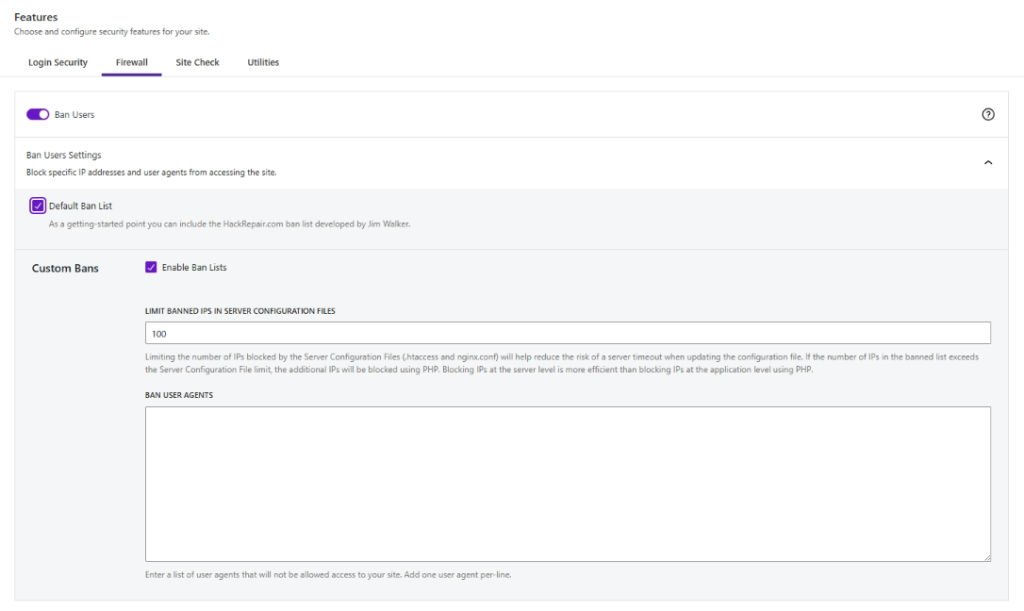
On the firewall settings we make sure that the “Ban Users” slider is active and we toggle the “Default Ban List” checkbox. So if needed we can ban user agents here.
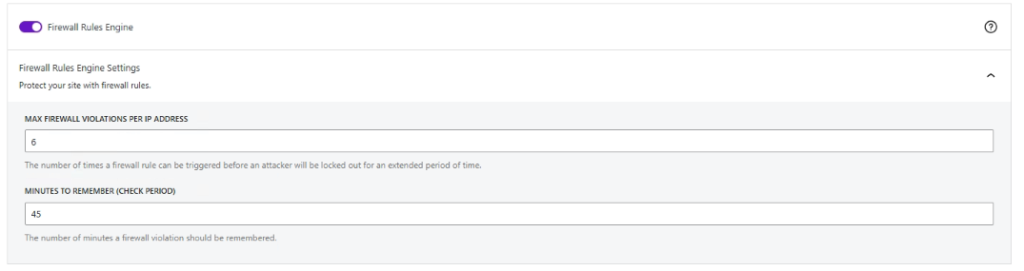
The “Firewall Rules Engine” slider has to be active as well. So we can profit from additional security in form of firewall rules which protect our website. We tweak the settings a little bit here, and choose 6 maximum firewall violations per ip address and SolidSecurity should remember these IP addreses for 45 minutes.
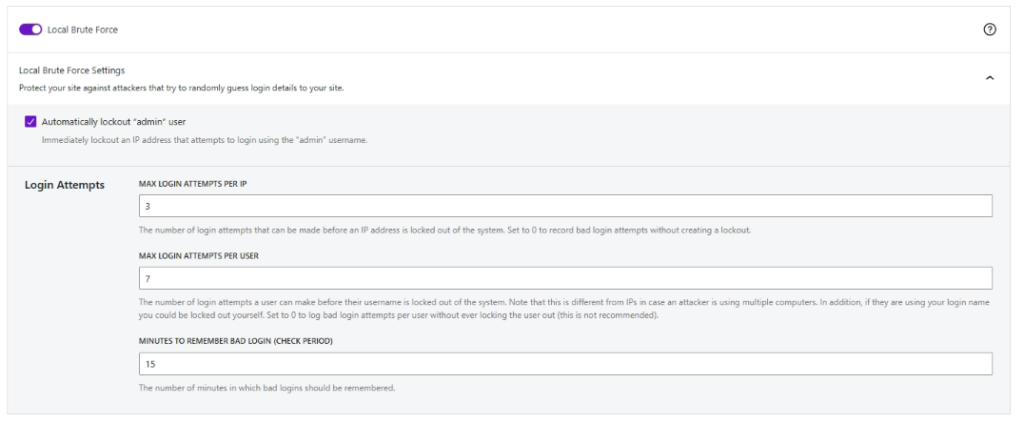
We make sure that the slider “Local Brute Force” is active as well. We check the box “Automatically lockout “admin” user. Make sure that you dont use an admin user with the name “admin” before!
We tweak some settings here as well in the section “Login Attempts”. We set the maximum login attempts per IP to 3, the maximum login attempts per user to 7 and the time to remember these bad logins to 15 minutes.
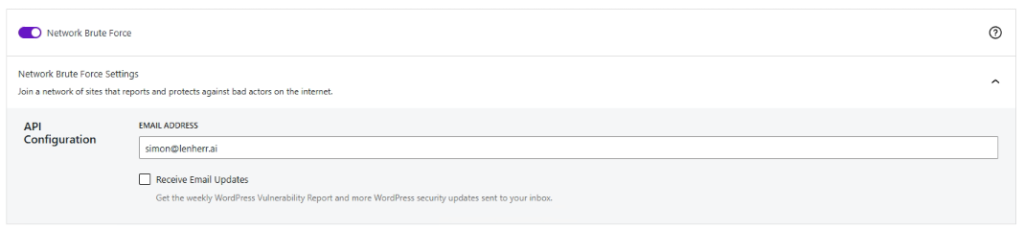
At last setting we check if the slider “Network Brute Force” is active and set a mail address.
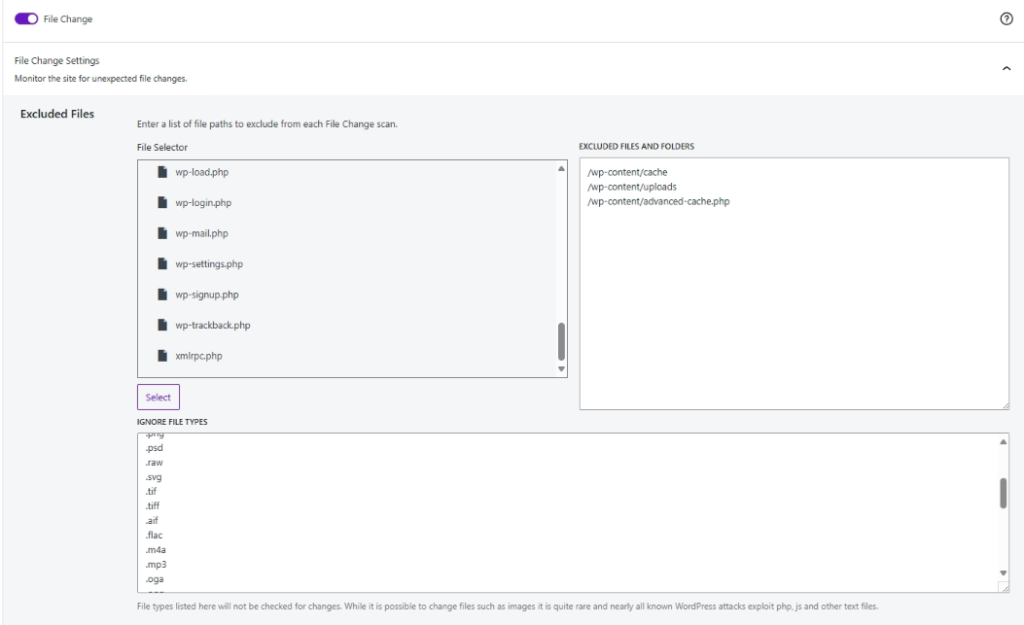
Under the next category “Site Check” we enable the setting “File Change”. So whenever a file gets changed on our website we recieve a notification email. So we don’t get spammed with a lot of mails we mark some paths as excluded (because these paths get changed a lot).
Next we enable the “Scheduled Site Scan”, so twice a day our website get scanned.
Under the next category “Utilities” we enable the “Enforce SSL”, just in case we forgot it when creating the website. So only SSL connections are allowed to our site.

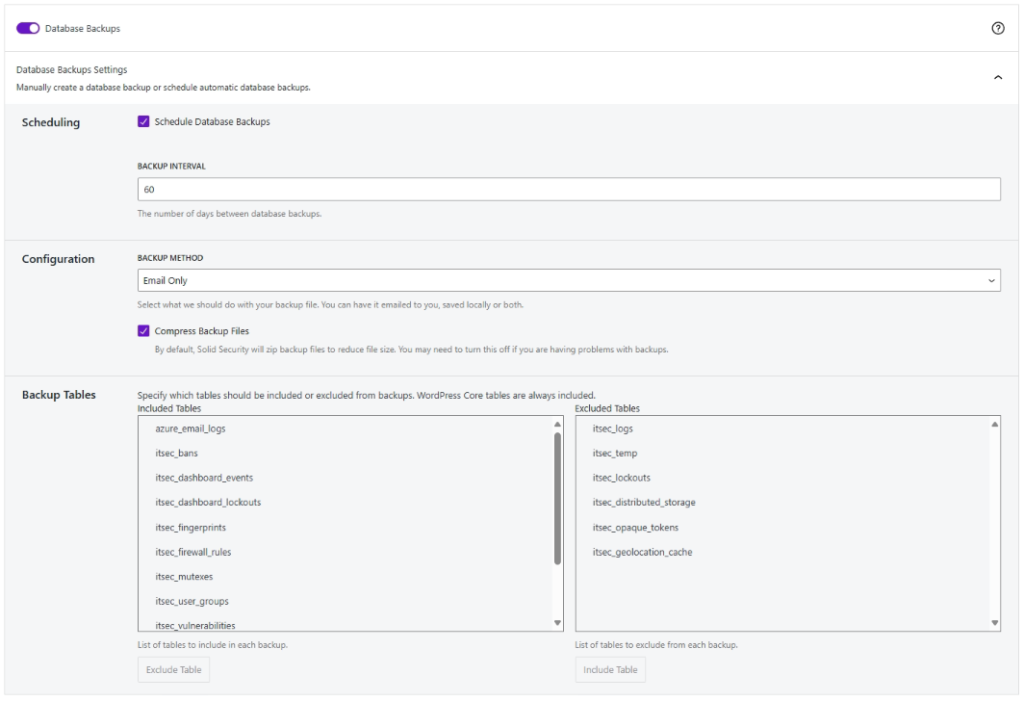
The next setting we enable is the “Database Backups”. Although we have a hourly backup from Azure we still backup the database only here. We set the backup interval to 60 days, because on a blog-website there are not much changes to the database. We send the DB directly to our admin mail address and let the backup tables to the defaults.
Further down we enable the “Security Check Pro” so we can profit from a API connection to SolidWP.com for additional security.
Advanced
Under the tab “Advanced” we can tweak some other options. Under “System Tweaks Settings” we toggle all checkboxes for maximum security for example disabling PHP Execution in uploads or Plugins.
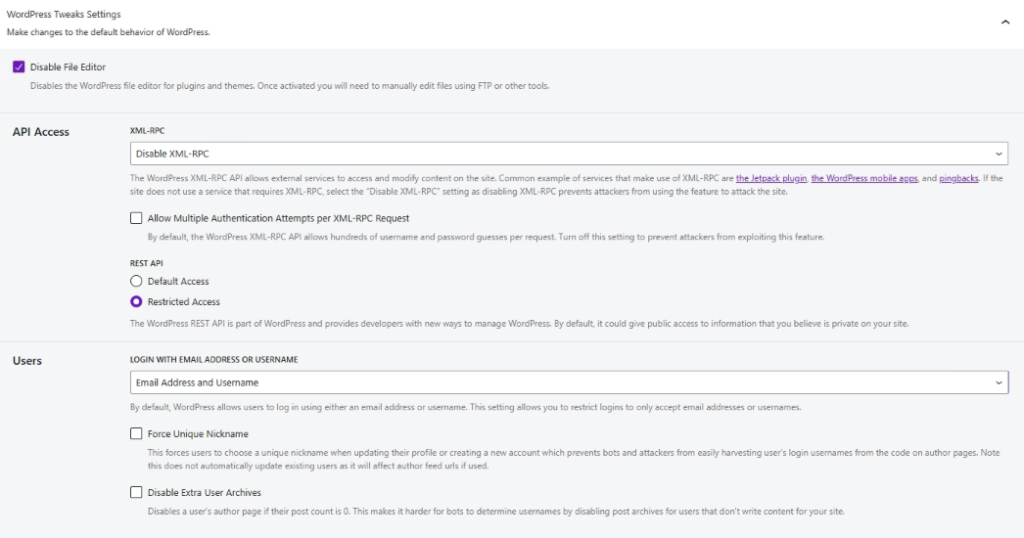
Under “WordPress Tweaks Settings” we disable the file editor from wordpress and set the REST API to “Restricted Access”. If you aren’t a developer the chances that you need that API is quite low.
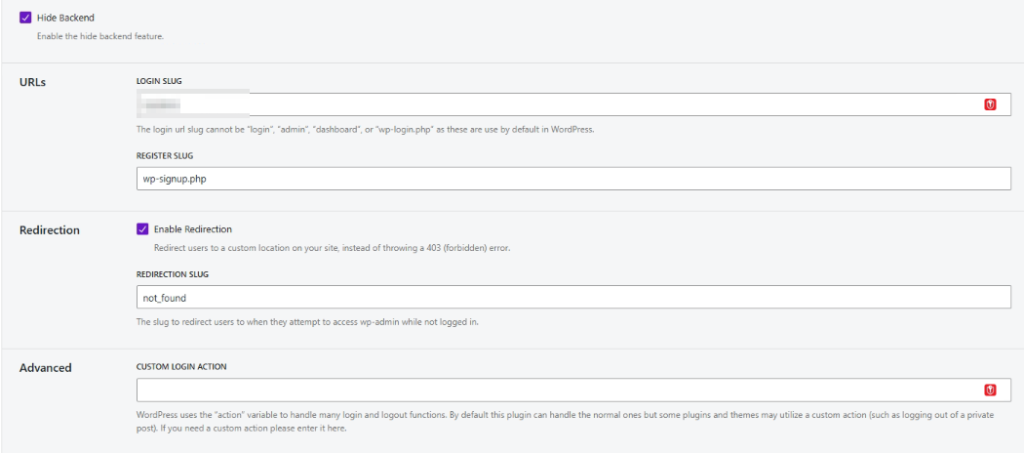
Under the tab “Hide Backend Settings” we can configure what the wp_admin.php login page should be named. Because a lot of attacks try to log on to with one of your accounts they need to know the link to the backend page. So we enable the “Hide backend” setting and give the new URL a name like “keys-to-my-house”.
Under “Redirection” we enable the redirection, so if someone is trying to go to wp_admin.php the get redirected to “not_found” are whatever you choose here.
No we hardened our website with a fully free security tool! We are a lot saver now out in the big wide internet. 🙂