Configuring a virtual Switch
To set the network for our Hyper-V server we quickly configure a virtual Switch. We set the connection type to “External”.
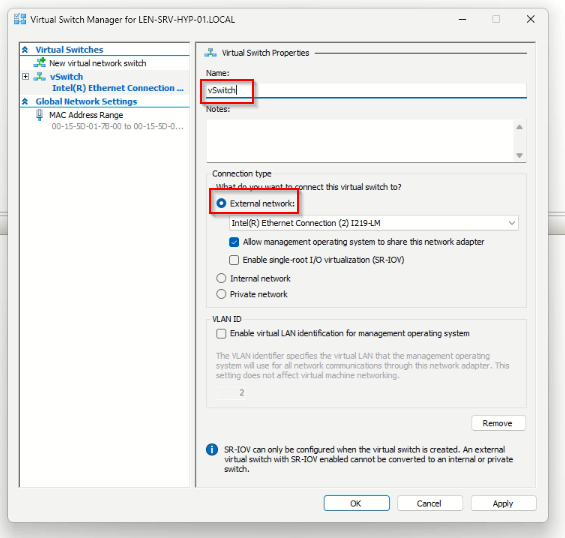
To match the connection type your needs, here are the three connection types of a virtual switch:
- External switches are bound to the physical network cards located in the host. They provide VMs located on them access to the physical network to which the Hyper-V host is connected. The External switch can also share management traffic and VM traffic on the same switch, which is one of the options that can be set when creating the external switch.
- Internal switches are not bound to a physical network card. They only allow traffic between VMs and the host itself. However, in 2016, new functionality was added to allow external connectivity via NAT from the Hyper-V host: the NAT forwarding internal switch.
- Private switches are only used for virtual machines to communicate with each other. This type can be useful for specific types of traffic such as a cluster network only if you are using one host (as it can’t be used between hosts).
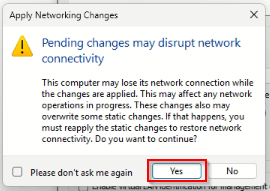
If you are working remote, you could lose the connection to your server for a few seconds, that’s totally normal as long as the vSwitch is getting configured.
Configuring virtual SAN
Instead of configuring a vSAN, I decided to connect an iSCSI target which is a popular implementation of a SAN. In this chapter I show you have to connect your Windows Server Core Hyper-V to an existing iSCSI target.
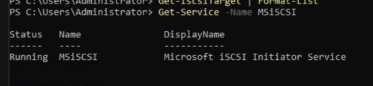
First of all we check if the MSiSCSI-Service is running on our server. To check that we type the following command:
Get-Service -Name MSiSCSICode language: PowerShell (powershell)If the service is already running you get an output like this:
If your service isn’t running start the service:
Start-Service -Name MSiSCSICode language: PowerShell (powershell)To make sure that the service gets started automatically we set the startup type to automatic with the following command:
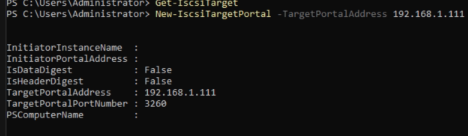
Set-Service -Name MSiSCSI -StartupType AutomaticCode language: PowerShell (powershell)After starting the service we add a new iSCSI target portal. There are more options than in my case, if you have different port numbers you have to add them to. In my case I just create a new iSCSI target portal with the default port and the IP address of my QNAP NAS.
Additional options for this command you find here.
After adding the iSCSI-target we now want to connect to that iSCSI-target. To do that step we have to know the exact NodeAddress. An iSCSI NodeAddress begins with “iqn”. Make sure you have that address in hand.
Type the following command to connect to the newly added iSCSI-target.
Connect-iSCSITarget -NodeAddress <iqn.XYZ> -IsPersistent $trueCode language: PowerShell (powershell)In my case it looks like this:

I added the Switch “IsPersistent” to make sure the iSCSI-target doesn’t get lost after a reboot.
Now we check if the iSCSI-target is connected.
Get-iSCSITarget | Format-ListCode language: PowerShell (powershell)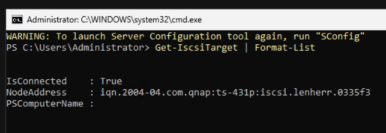
So we successfully connected to our iSCSI-target. But if we, for example, try to add an ISO for our VM’s we do not see the iSCSI disk. That’s totally normal! we now have to take that new iSCSI disk online.
To check our disks we enter the following command:
Get-DiskCode language: PowerShell (powershell)
As we can see, the disk with the number “1” is on the OperationalStatus “Offline”. So we have to change that, to use that disk.
Set-Disk -Number 1 -IsOffline $FalseCode language: PowerShell (powershell)With this command we get that sucker online.

Let’s test that. We create a new virtual machine in our Hyper-V Manager. Just for test purposes we don’t have to change any of the settings. In the chapter “Connect Virtual Hard Disk” we click on “Browse”.
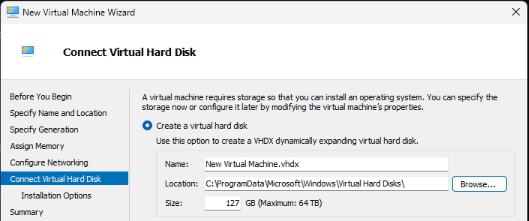
Now we navigate to the root directory of the server view -> we click on the server name on the left hand side.
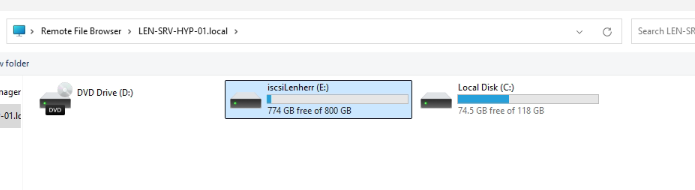
And we successfully added the iSCSI-target to our Windows Server Core and took the disk online!
Enabling File shares on Windows Server Core
Before creating my first VM, i ran into a problem, because on Windows Server, file sharing is by default not allowed. To allow file sharing we have to create a firewall rule on Windows Server Core.
Open Powershell on your Windows Server Core and type:
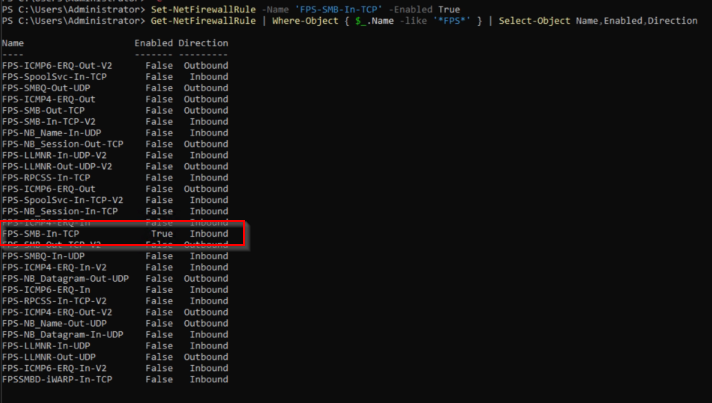
Set-NetFirewallRUle -Name 'FPS-SMB-In-TCP' -Enabled TrueCode language: PowerShell (powershell)To check if the firewall rule is enabled, you can enter the following in Powershell on your Windows Server Core:
Get-NetFirewallRule | Where-Object { $_.Name -like '<em>FPS</em>' } | Select-Object Name,Enabled,DirectionCode language: PowerShell (powershell)In the output, you should find your rule with the status Enabled -> “True”:
If you try to connect from your client to your Windows Server Core it should work as well.
